My Airgradient project is finally finished. I made some adjustments that I would like to share with you.
- The air quality index (AQI) is displayed in Home Assistant and is calculated based on the values of the CO2 sensor and the PM sensor.
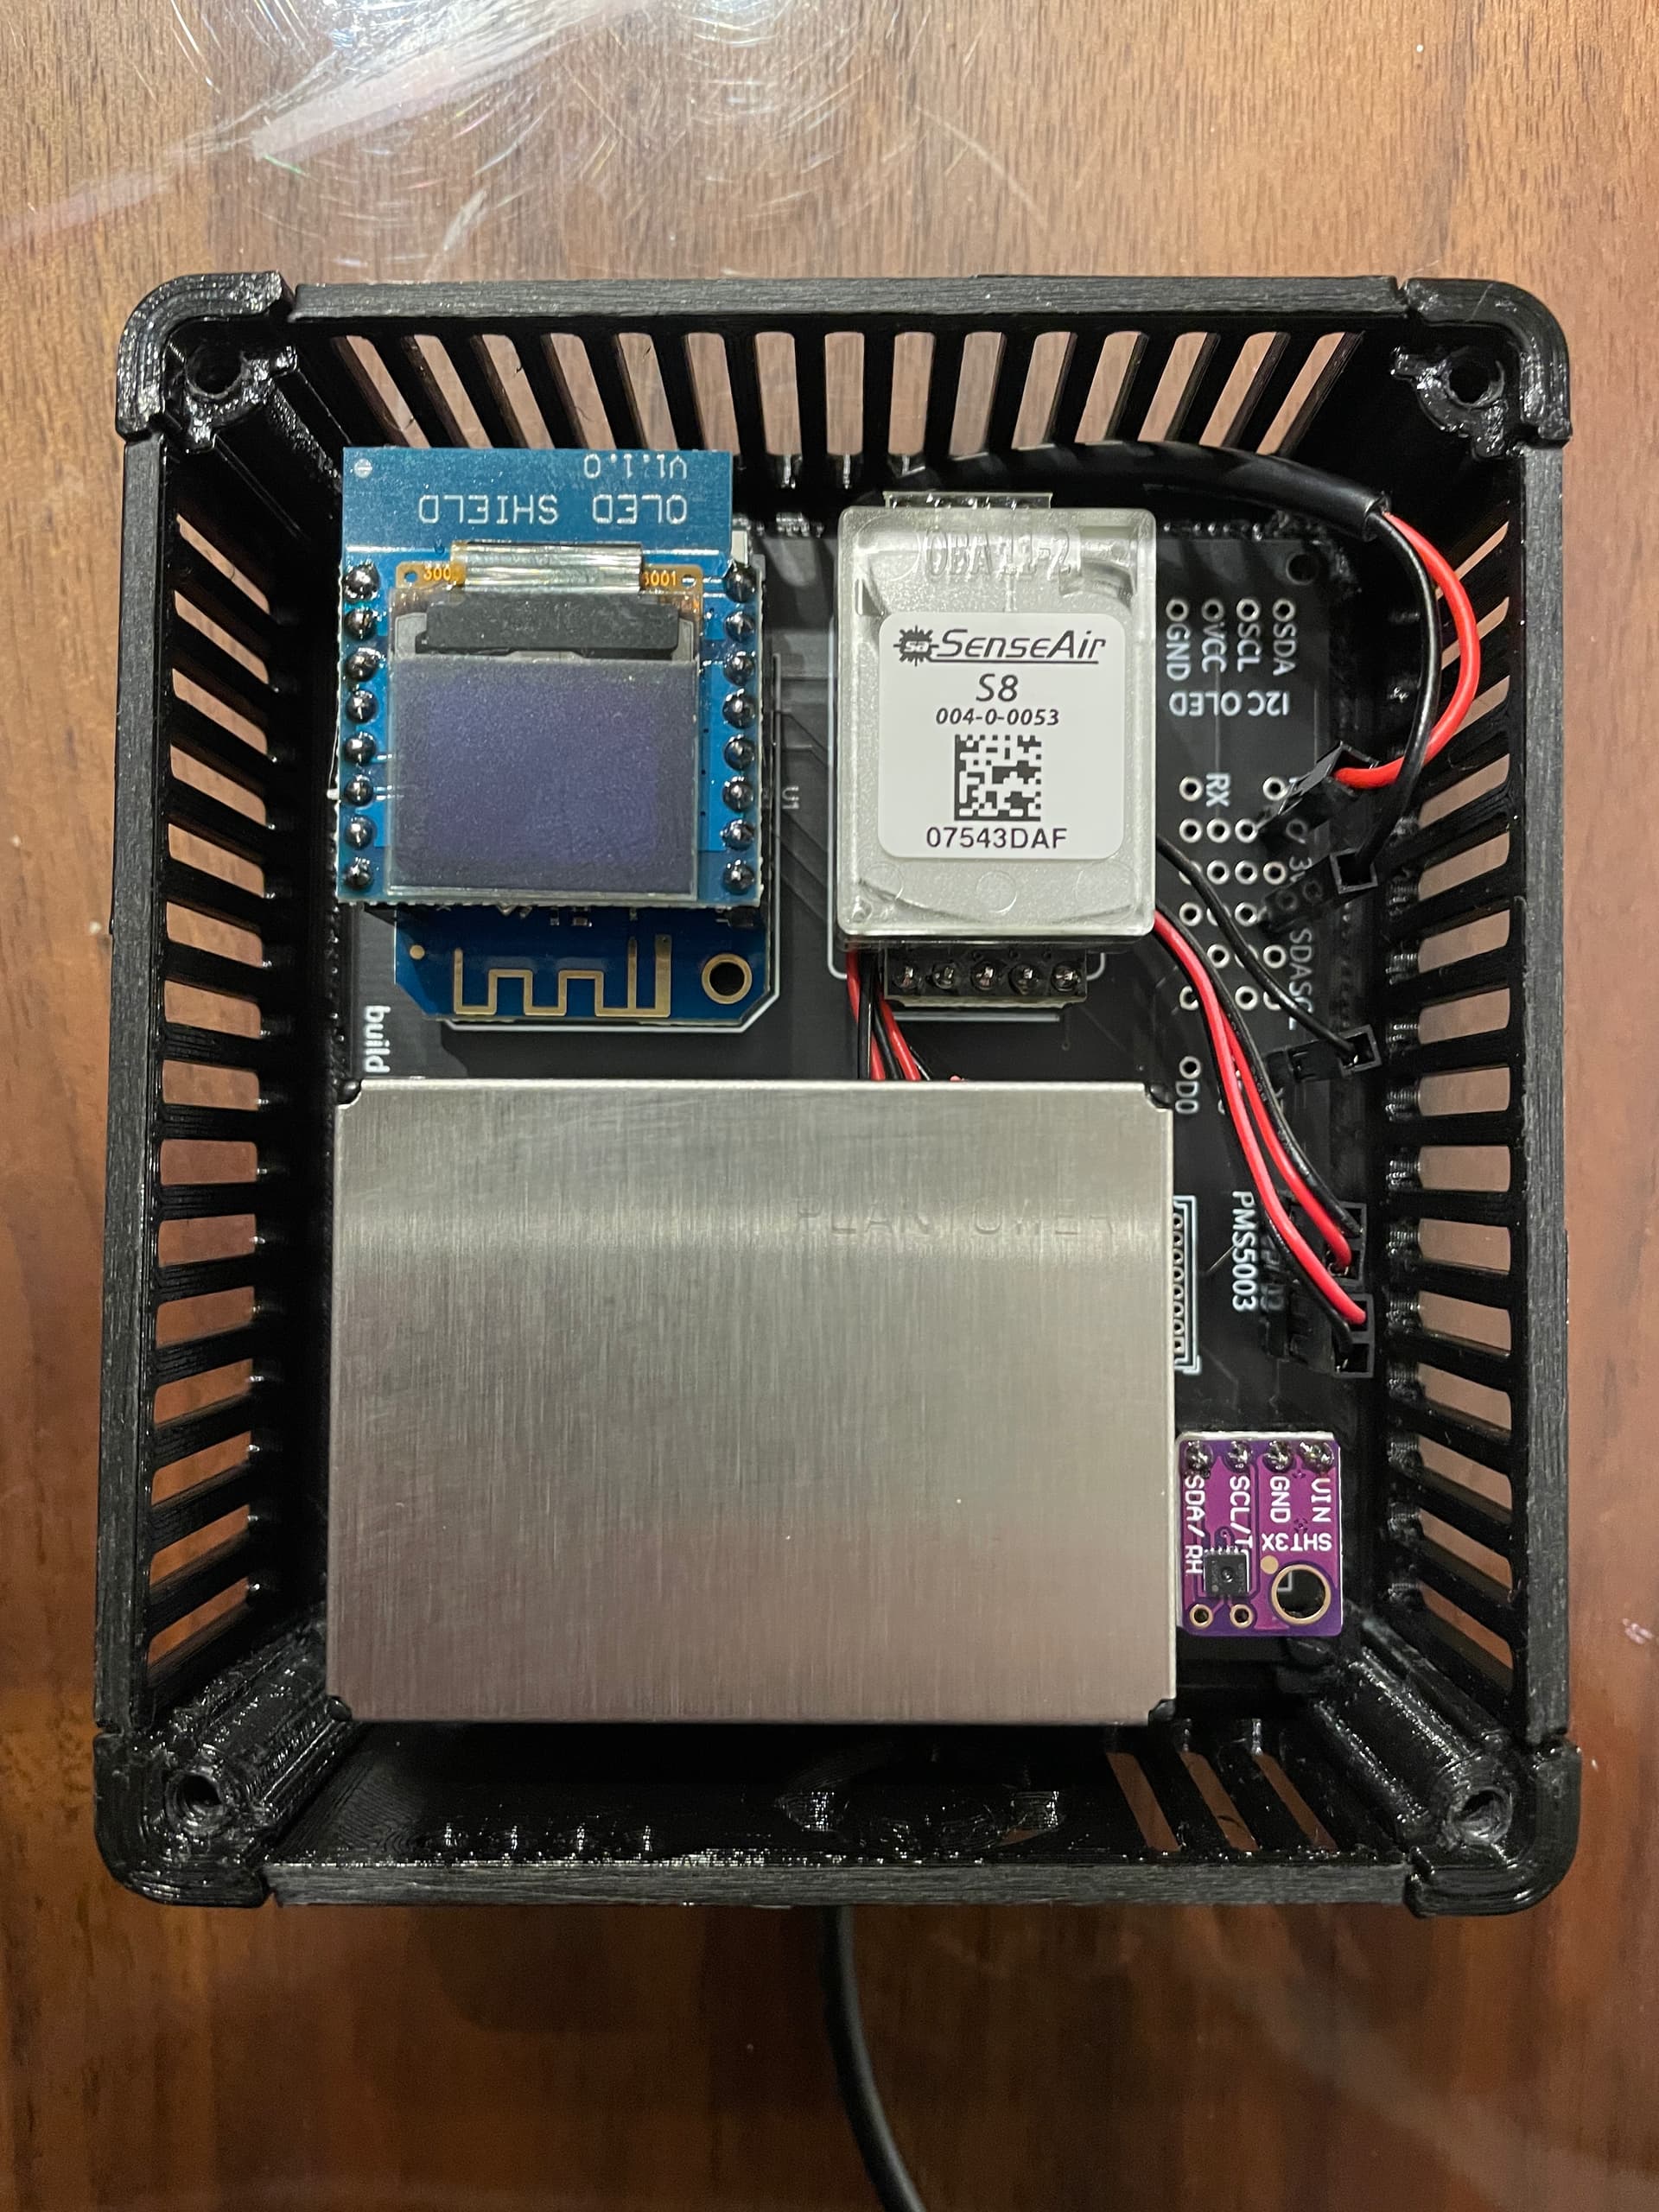
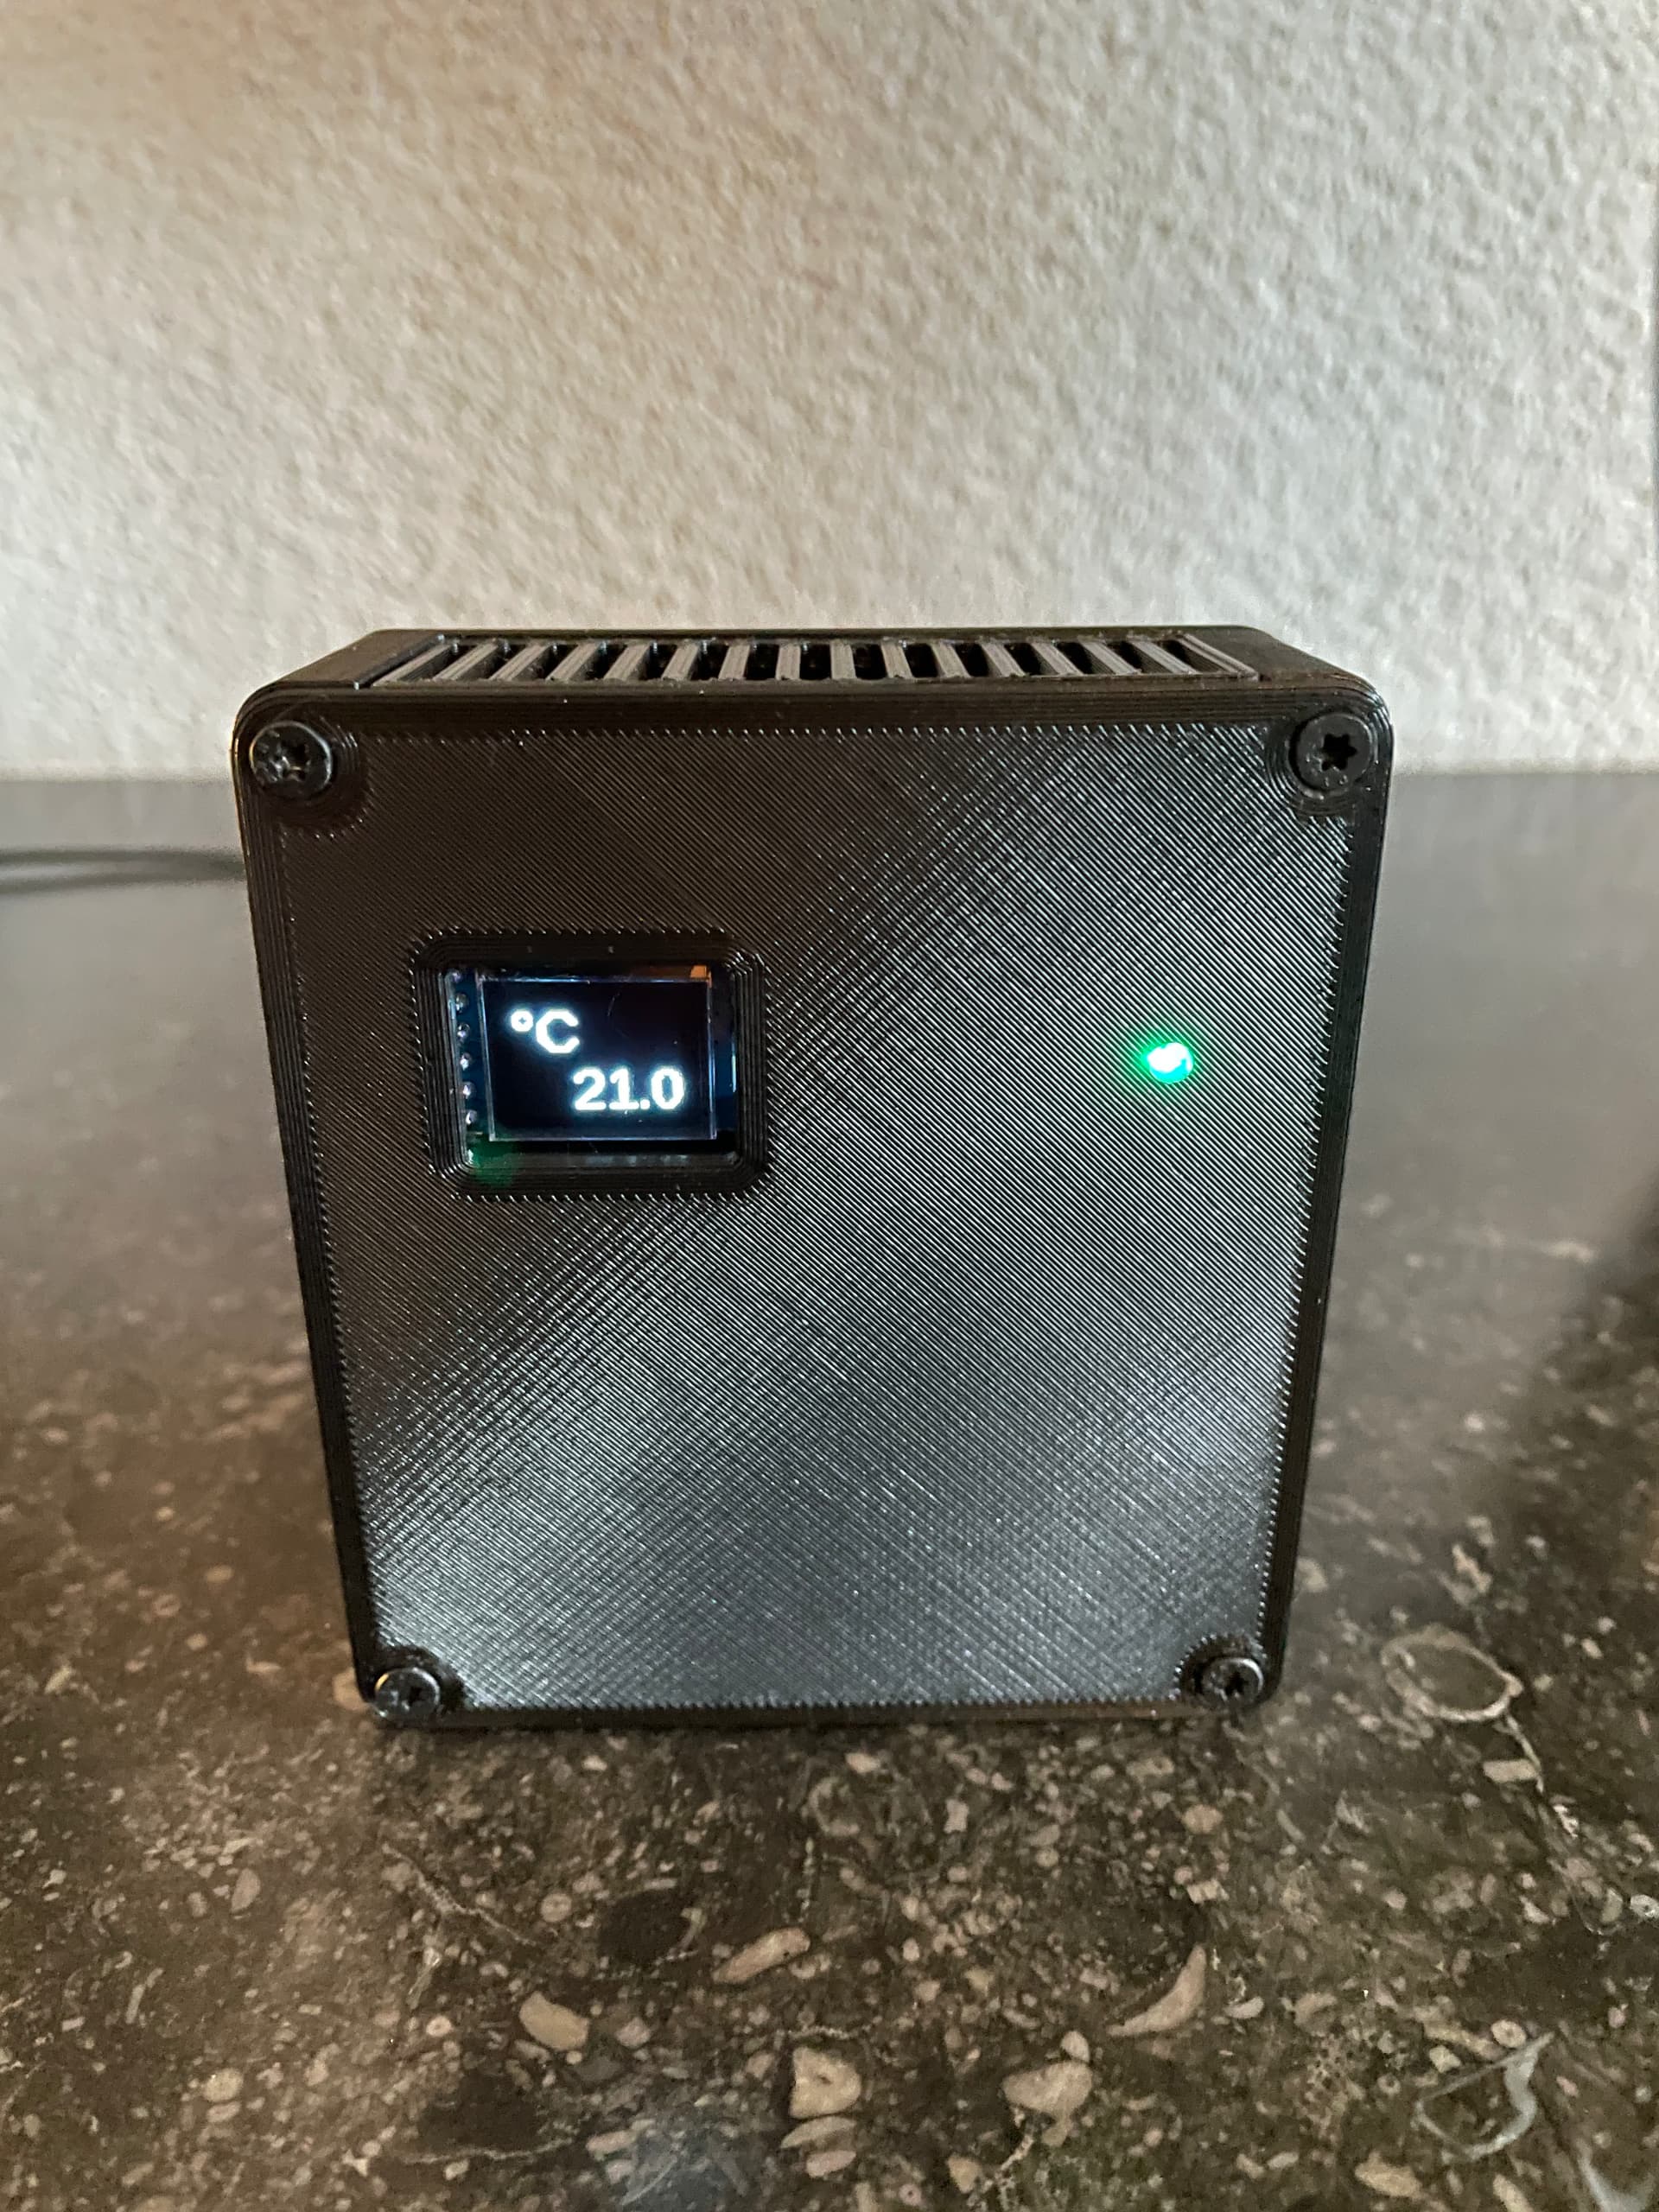
- I have built in a status RGB LED (WS2812B) that indicates the status of the Air Quality Index with three colors: green, orange and red. This LED is connected to GPIO15.
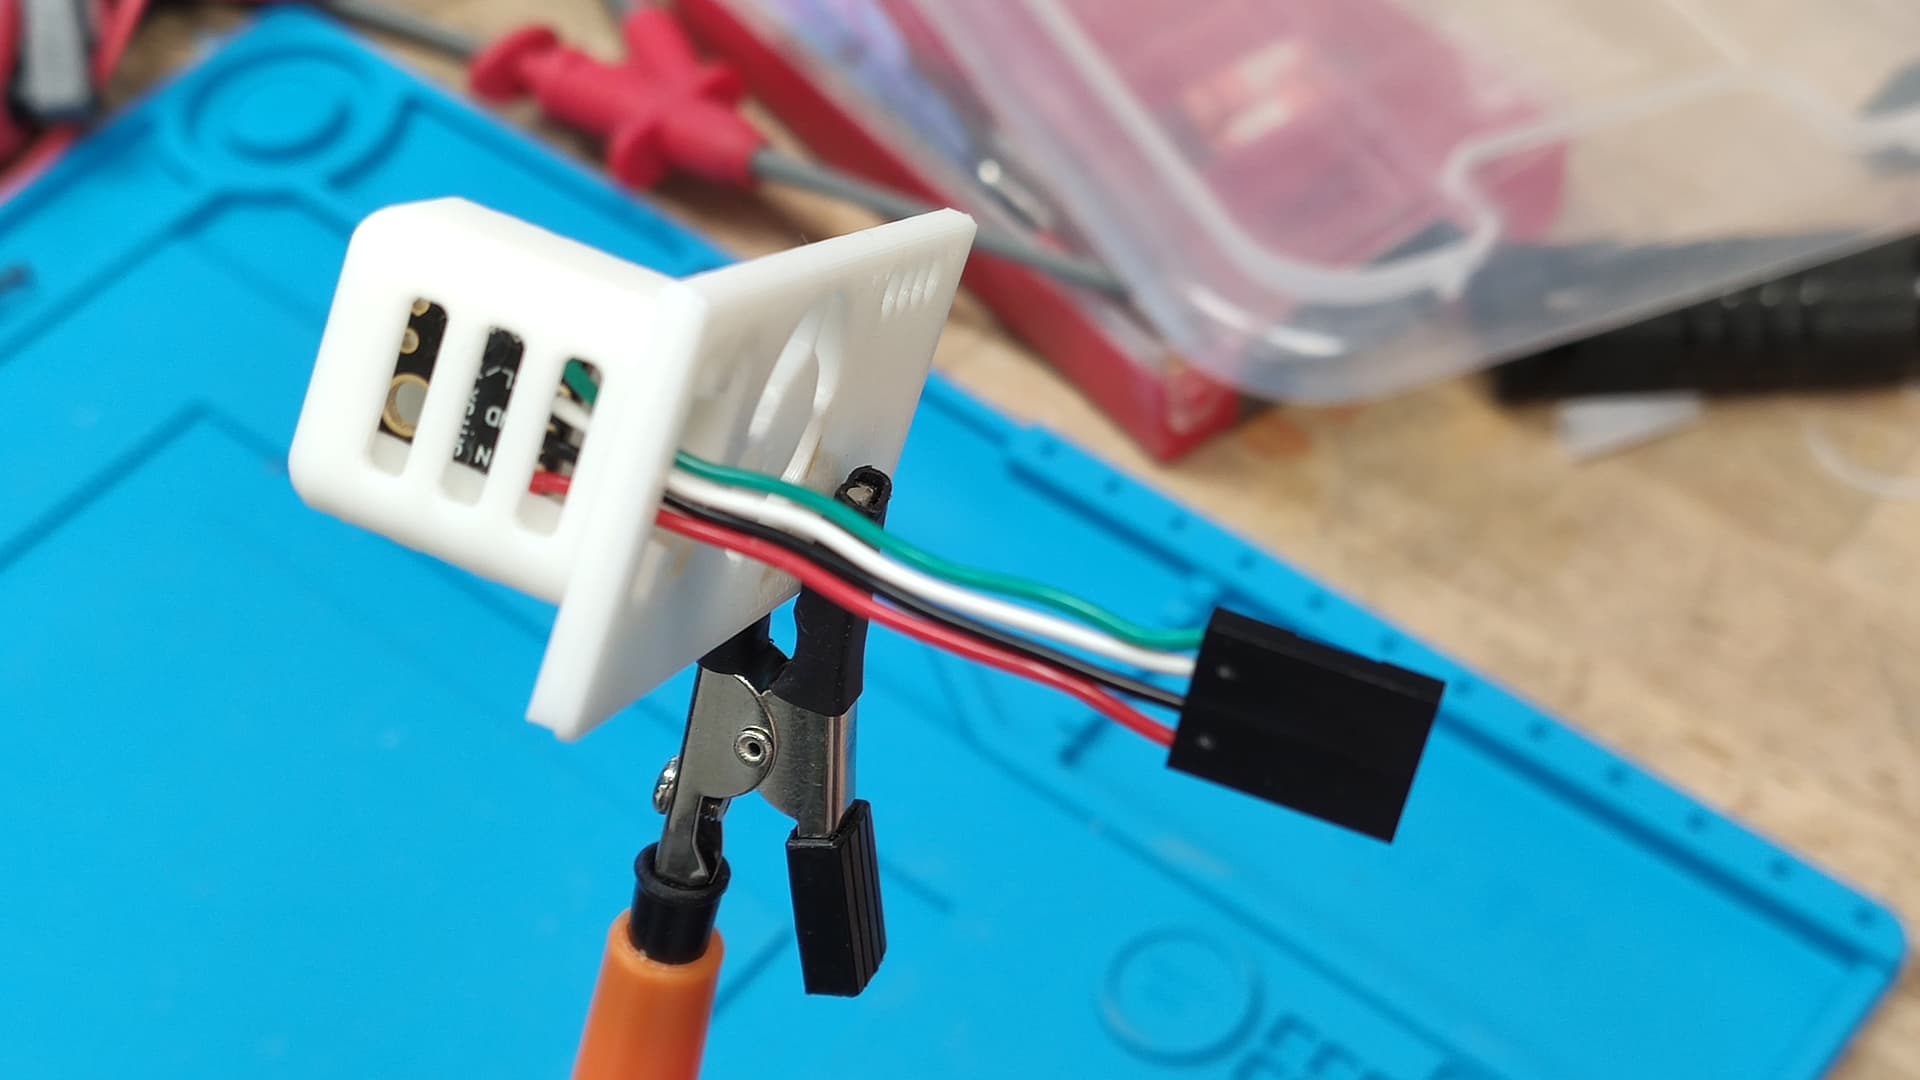
- The life of the PMS5003 sensor has been extended by using the SET functionality. See my other article: Extending the life span of the PMS5003 sensor for more information.
- I used the design from ttielemans for the case. Instead of connecting the power directly to the ESP module, it is fed into the back of the housing via a USB cable.
The project runs on ESPHome software. Below the code:
# Instructions: https://esphome.io/guides/getting_started_hassio.html
esphome:
  name: airgradient

esp8266:
  board: d1_mini

# Enable logging
logger:

# Enable Home Assistant API
api:
  password: !secret API_Password

ota:
  safe_mode: true
  password: !secret OTA_Password

# https://esphome.io/components/wifi.html
wifi:
  ssid: !secret wifi_ssid
  password: !secret wifi_password
  fast_connect: true
  manual_ip:
    static_ip: 192.168.3.12
    gateway: 192.168.3.1
    subnet: 255.255.255.0

captive_portal:

# Configuration for AirGradient DIY v2 device
# https://www.esphome-devices.com/devices/AirGradient-DIY/

# https://esphome.io/components/uart.html#uart
uart:
  - rx_pin: D4
    tx_pin: D3
    baud_rate: 9600
    id: senseair_s8_uart

  - rx_pin: D5
    tx_pin: D6
    baud_rate: 9600
    id: pms5003_uart

i2c:
  sda: D2
  scl: D1

sensor:
    # https://esphome.io/components/sensor/pmsx003.html?highlight=pms5003
  - platform: pmsx003
    type: PMSX003
    uart_id: pms5003_uart
    pm_1_0:
      name: "Airgradient PM <1.0µm"
      id: pm1
      filters:
        - sliding_window_moving_average:
            window_size: 30
            send_every: 30
    pm_2_5:
      name: "Airgradient PM <2.5µm"
      id: pm2_5
      filters:
        - sliding_window_moving_average:
            window_size: 30
            send_every: 30
    pm_10_0:
      name: "Airgradient PM <10.0µm"
      id: pm10
      filters:
        - sliding_window_moving_average:
            window_size: 30
            send_every: 30

    # https://esphome.io/components/sensor/senseair.html
  - platform: senseair
    co2:
      name: "Airgradient CO2"
      id: co2
    update_interval: 60s
    uart_id: senseair_s8_uart

    # https://esphome.io/components/sensor/sht3xd.html?highlight=sht31
  - platform: sht3xd
    temperature:
      name: "Airgradient Temperature"
      id: temp
      filters:
        - offset: -1.5
    humidity:
      name: "Airgradient Humidity"
      id: humidity
      filters:
        - offset: +3
    address: 0x44
    update_interval: 60s

    # The WHO guidelines work with 24-hour averages of the PM2.5 and PM10 sensors
  - platform: template
    name: "Airgradient PM <2.5µm 24h average"
    id: pm2_5_avg_24h
    icon: mdi:chemical-weapon
    unit_of_measurement: µg/m³
    lambda: |-
      return id(pm2_5).state;
    update_interval: 60s
    filters:
      - sliding_window_moving_average:
          window_size: 1440  # = 24 hours x 60 minutes
          send_every: 1
    on_value:
      then:
        - script.execute: update_aqi
  - platform: template
    name: "Airgradient PM <10.0µm 24h average"
    id: pm10_avg_24h
    icon: mdi:chemical-weapon
    unit_of_measurement: µg/m³
    lambda: |-
      return id(pm10).state;
    update_interval: 60s
    filters:
      - sliding_window_moving_average:
          window_size: 1440  # = 24 hours x 60 minutes
          send_every: 1
    on_value:
      then:
        - script.execute: update_aqi

# A textual presentation of the AQI: goed, matig, slecht
text_sensor:
  - platform: template
    name: "Airgradient Air Quality Index"
    id: aqi
    icon: mdi:air-filter

# This script is called on every update of the relevant sensor values.
script:
  - id: update_aqi
    mode: restart
    then:
      # Bad if at least one of the sensor values is bad
      - if:
          condition:
            or:
              - sensor.in_range:
                  id: co2
                  above: 1199
              - sensor.in_range:
                  id: pm2_5_avg_24h
                  above: 25
              - sensor.in_range:
                  id: pm10_avg_24h
                  above: 50
          then:
            - text_sensor.template.publish:
                id: aqi
                state: Slecht
            - script.execute: show_bad
          else:
            # Acceptable if at least one of the sensor values is acceptable
            - if:
                condition:
                  or:
                    - sensor.in_range:
                        id: co2
                        above: 899
                    - sensor.in_range:
                        id: pm2_5_avg_24h
                        above: 12
                    - sensor.in_range:
                        id: pm10_avg_24h
                        above: 25
                then:
                  - text_sensor.template.publish:
                      id: aqi
                      state: Matig
                  - script.execute: show_acceptable
                else:
                  # Otherwise good (all of the sensor values are good)
                  - text_sensor.template.publish:
                      id: aqi
                      state: Goed
                  - script.execute: show_good

    # Configuration for showing AQI status with the RGB LED
  - id: show_bad
    then:
      - light.turn_on:
          id: status_led
          brightness: 25%
          red: 100%
          green: 0%
          blue: 0%
  - id: show_acceptable
    then:
      - light.turn_on:
          id: status_led
          brightness: 25%
          red: 100%
          green: 60%
          blue: 0%
  - id: show_good
    then:
      - light.turn_on:
          id: status_led
          brightness: 25%
          red: 0%
          green: 100%
          blue: 0%

display:
  - platform: ssd1306_i2c
    # https://esphome.io/components/display/ssd1306.html?highlight=display
    model: "SSD1306 64x48"
    id: oled_display
    reset_pin: D0
    address: 0x3C
    rotation: 180
    # rotation: 180 # Enable to 180 to flip screen around
    pages:
      - id: display_pm2
        lambda: |-
          it.print(0, 0, id(font1), "PM2,5");
          it.printf(64, 24, id(font1), TextAlign::TOP_RIGHT, "%.0f",id(pm2_5).state);
      - id: display_pm10
        lambda: |-
          it.print(0, 0, id(font1), "PM10");
          it.printf(64, 24, id(font1), TextAlign::TOP_RIGHT, "%.0f",id(pm10).state);
      - id: display_co2
        lambda: |-
          it.print(0, 0, id(font1), "CO2");
          it.printf(64, 24, id(font1), TextAlign::TOP_RIGHT, "%.0f",id(co2).state);
      - id: display_temp
        lambda: |-
          it.print(0, 0, id(font1), "°C");
          it.printf(64, 24, id(font1), TextAlign::TOP_RIGHT, "%.1f",id(temp).state);
      - id: display_humidity
        lambda: |-
          it.print(0, 0, id(font1), "HUM");
          it.printf(64, 24, id(font1), TextAlign::TOP_RIGHT, "%.0f%%",id(humidity).state);

font:
    # Font to use on the display
    # Open Source font Liberation Sans by Red Hat
    # https://www.dafont.com/liberation-sans.font
  - file: './fonts/liberation_sans/LiberationSans-Regular.ttf'
    id: font1
    size: 22

interval:
  - interval: 3s
    # Cycle through page on display
    then:
      - display.page.show_next: oled_display
      - component.update: oled_display
  - interval: 120s
    # Two-minute interval to extend the life span of the PMS5003 sensor
    then:
      - switch.turn_on: pms_set
      - delay: 20s
      - switch.turn_off: pms_set

switch:
  - platform: gpio
    # Switch for PMS5003 sensor
    pin:
      number: D7
    id: pms_set
    name: "Airgradient PMS5003 Switch"

light:
  - platform: neopixelbus
    type: GRB
    variant: WS2812x
    pin: GPIO15
    num_leds: 1
    name: "AQI Status LED"
    id: status_led
@ Achim Haug @Achim_AirGradient and @Thor Tielemans @ttielemans: thanks for your ideas!