Mounting the SHT and TVOC sensors directly would probably not make much difference from soldering a module on the same spot. However it is something we look into in case we will offer a pre assembled kit.
I can’t speak for all users, but personally I use AirGradient so I can get data into Prometheus. The DIY portion for me is because it’s the cheapest way, and I have the skills for both programming the Arduino and soldering the kit.
If there was an affordable way to get accurate air quality data into Prometheus, for instance a preassembed Wemos or Lolin D1 with accurate sensors, I would use that instead. Bonus points if it functions as a Prometheus metrics endpoint without me having to flash it.
I like the look and the optional headers for other sensors. I’m on board!
Thank you for the valuable feedback.
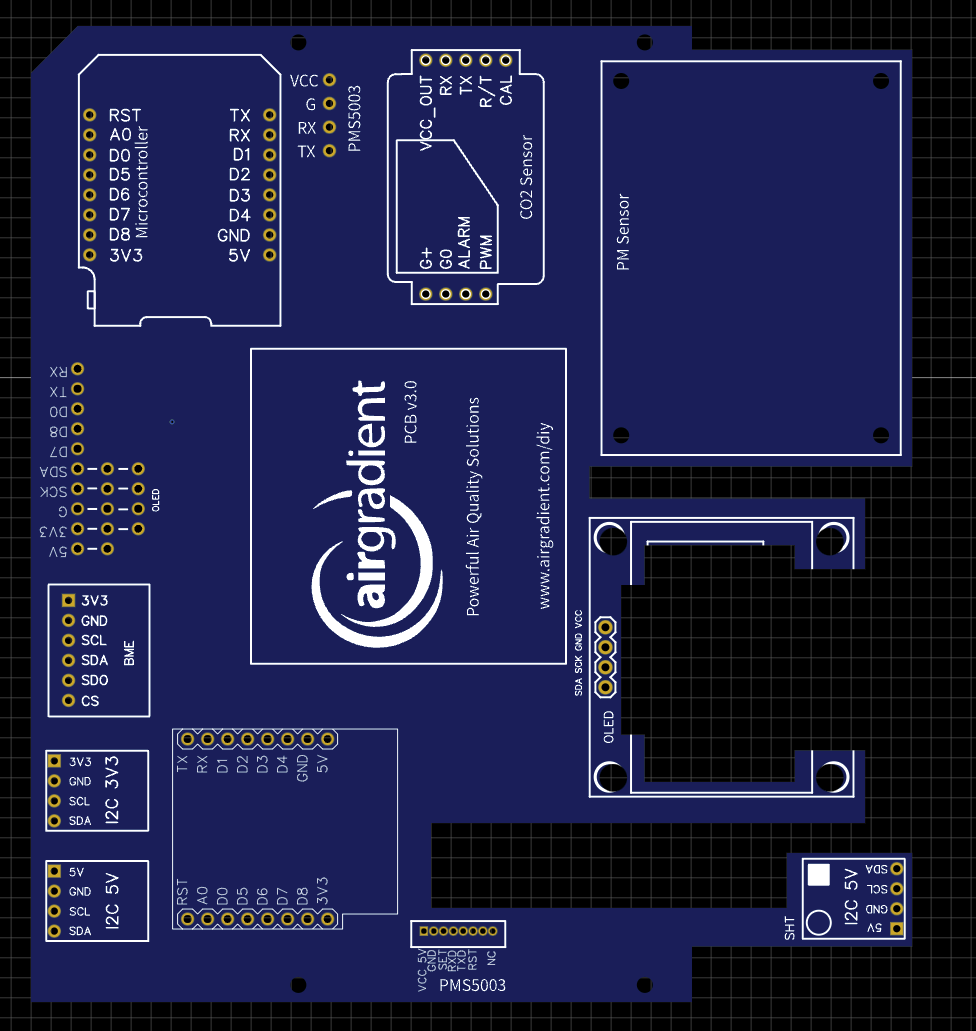
I want to share with you an update on the DIY v2 design.
I incorporated the following:
- added the breakout pins (now compatible with 2.56mm pin headers)
- added a Bosch BME sensor slot
- added a slot for the bigger OLED display either on the front or backside
- added a 2nd PMS connector that fits the standard cable
- improved the naming conventions
- flipped the S8 sensor to have the air intake on the top (in line with the recommended mounting direction)
I experienced with the ESP32 mini but it is difficult to get it placed inside the enclosure also due to the cable coming out of it that needs space. So at the moment, I believe it’s better to stick with the ESP8266.
Here is the current layout.
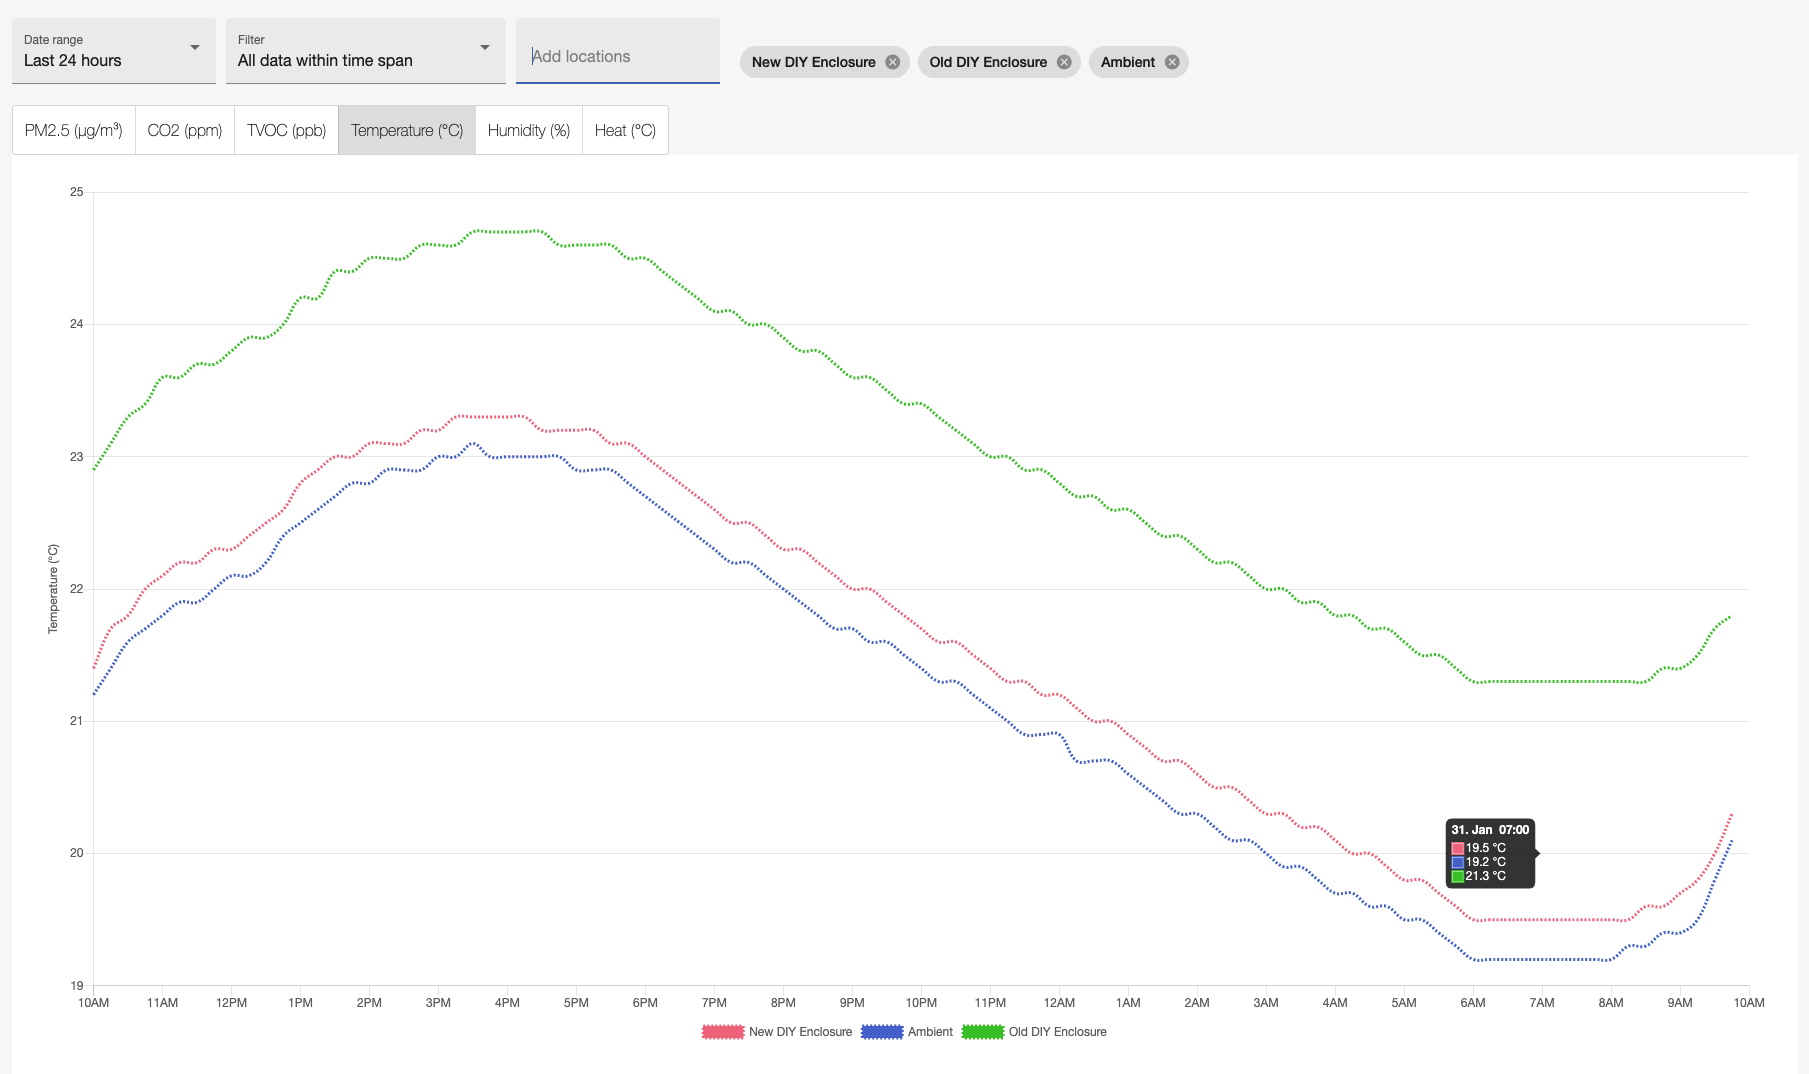
I am also running temperature measurements against the old DIY enclosure / PCB (without the external temperature probe) and you can see that we are now only 0.3C above ambient air temperature whereas the old enclosure is 2.0C above.
I will keep you posted. If you have any further feedback, questions or ideas please let me know.
6 Likes
I love all of this!
Having the breakout pins be compatible with regular headers will be a very welcomed improvement
I like the option for the PMS that fits the standard cable. Will your kits have the option to have a socket that could be soldered to the board, or will that be up to the DIYers?
Not sure what you mean with cable as the ESP8266 also has the charging cable. Have you looked at the Wemos S2 mini? It has the same size as the Wemos D1 mini currently used but is an ESP32 S2. According to the documentation it is also compatible to the Wemos D1 mini shields. So it might be a simple drop-in replacement.
The new housing seems to be big enough to potentially also add a battery and a TP4056 Lithium Battery Charger and remove the need for a constant power supply. Assuming that no OLED or LEDs are installed at the same time.
1 Like
I have another question/remark regarding the screw holes of the PM sensor:
While assembling my current kit, I noticed that the PCB has 1.7mm screw holes but the PMS5003 uses M2 screws according to its datasheet. Is there a particular reason to make the screw holes smaller than the screws? I first had trouble to get M2 screws through them and ended up extending the holes to 2mm.
Depending on your answer, maybe this could be addressed in version 2.
Yes, it is already addressed. Screw holes will fit M2 screws on the new PCB.
2 Likes
The ESP32 S2 is considerably wider because it has two additional pin rows. The cable management is not simple because the sensor needs to be placed in a way that avoids any modules and has enough length to bend.
Yes, I foresee a battery option. The new PCB has a mirrored D1 slot that can fit D1 shields. There is a battery charger shield that can be used on that slot and then connected to a battery. I have experienced with this and it should work well.
1 Like
Hi,
May I ask you what’s the size of the European wall junction box you’re talking about?
It would be awesome to just add the whole kit upon an existing box!
But I do agree with @lbhm and his point… isn’t it possible to have more mounting holes on the back? The ones compatible with the current gen’mounting holes, and the ones compatible with European/US wall boxes?
I wholeheartedly love the LED strip idea, but agree with the possibility to switch it off completely (together with the OLED display) either via software during night times or manually with a side switch/button!
Would that be possible?
Thanks,
With love,
L.
EDIT1
The battery idea is lovely… would that create heat problems?
1 Like
Is it possible to include detachable legs to support the enclosure in the verticle position? I move the unit around within our house and it would be handy.
Thanks, Doug
This looks great 
What’s the timeline around this? Will there be a beta phase?
Really excited and keen to have a go at building a v2 kit , and add one vote for vertical stand configuration.
Thanks
Thank you for the continuing feedback.
To answer questions of @Doug @Liknus @munco
We cannot change the plastic enclosure at all because it is already produced and we use plastic injection mold which is not easy to change so we cannot make any adjustments on the enclosure in regards to mounting holes, legs etc.
The standard mounting holes on the back fit the 60mm European junction boxes holes and also the vertical US junction boxed (around 83mm hole distance).
@Liknus The LED strip will be optional. I do not think the batteries will create a lot of heat.
From the timeline, I am waiting for an updated PCB from the factory to check if everything works. Then if it does we will start offering it. Realistically probably sometime in March.
1 Like
Is the new kit available yet?
I just got the updated PCB and currently testing it. Once it works well we will offer the new kits, probably beginning of March.
2 Likes
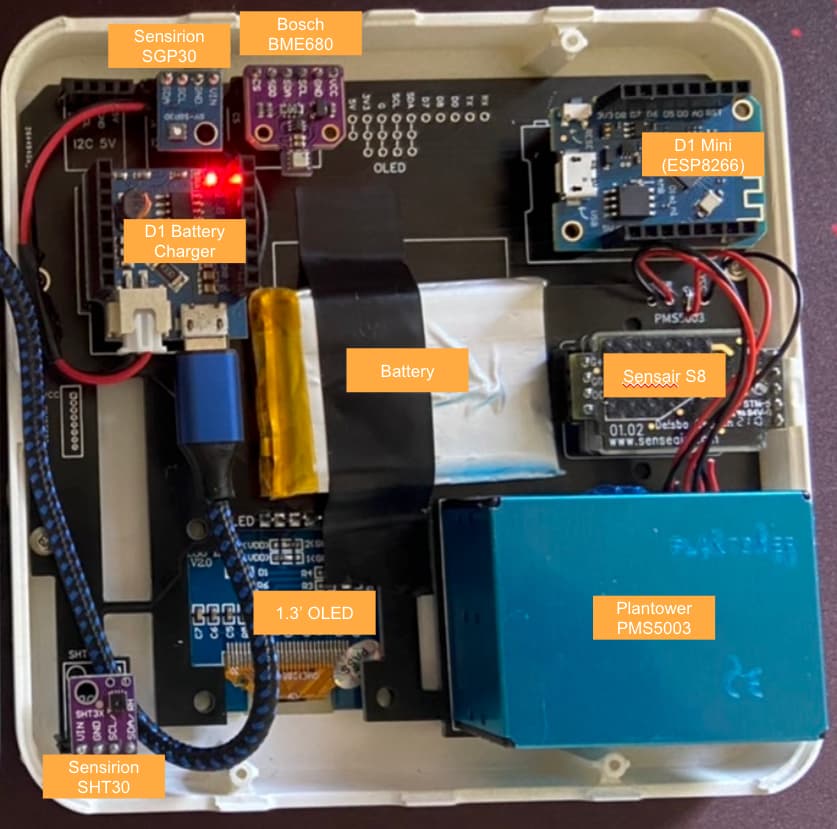
Just tested most of the PCB and it is looking good. The additional D1 slot allows e.g. adding a D1 battery charger with a battery thus allowing it to work offline (see picture below).
Also tested with the Bosch BME680 successfully.
Inside
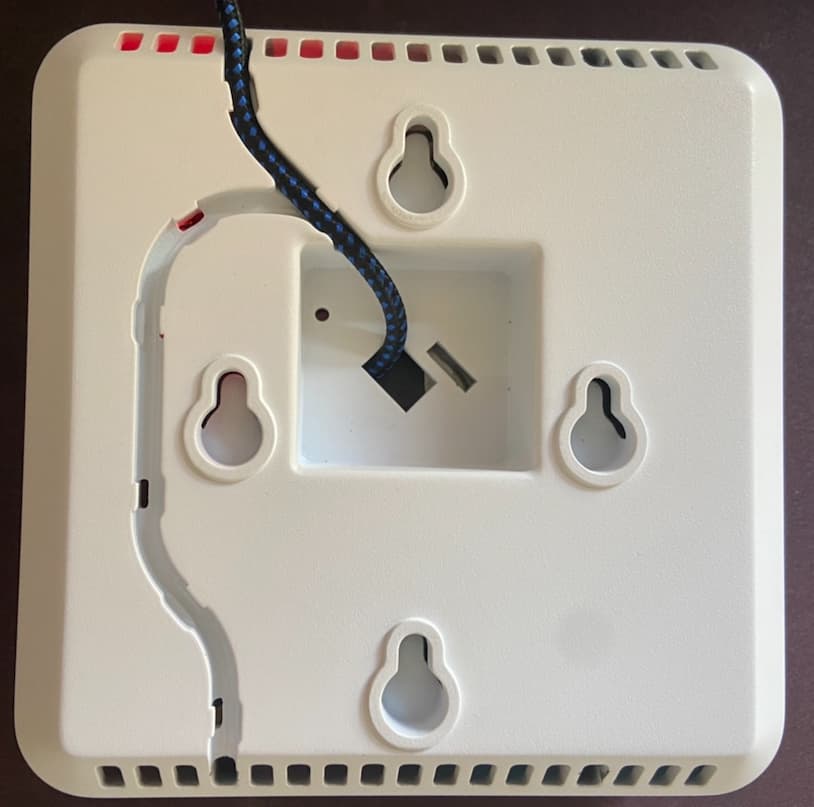
Backside
Frontside
To Do’s
- adding zip tie holes to fix a battery inside
- testing the PMS connector
We are considering making a limited batch now and sending it out to a few people in order to get early feedback. So if you are interested to get one of the first versions, please put yourself on the waiting list here:
https://forms.gle/b2zmUcFqZRDZsCuY8
This kit will most likely contain the following components:
- New AirGradient PCB
- Wemos D1 Mini Microprocessor
- Professional plastic injected enclosure
- 1’3 inch OLED display
- Plantower PMS5003 particle sensor
- Senseair S8 CO2 sensor
- SHT30 Temperature / humidity sensor
- SGP30 TVOC sensor
- D1 charge controller (battery not included)
- Extra pin headers, screws for PCB, PMS, and enclosure
Please let me know if you have any questions.
2 Likes
Very nice! Looking for it.
Looks great. I have two questions:
- Do you have an estimate for how long the new kit lasts with a battery such as the one you used?
- Are you planning to offer an “alternative” kit that only includes PCB and enclosure similar to the current PCB-only kit?
No front LEDs ?
Thanks
Cheers
EDIT1
very nice btw! Good work!
- Currently not very long because we do not put the sensors or D1 to sleep and have quite frequent readings. However this can all be solved by software and a small bridge in the D1 to enable deep sleep. Then you can probably have quite long battery life
- Yes we might also offer a PCB / Enclosure only kit but we are not sure yet