>>> Join Us in the Fight Against Air Pollution

AirGradient Forum

Possibly bricked device - anyone managed to recover before?

Tried to flash my new Airgradient Indoor v9 hardware with the latest firmware off my laptop (linux, browser flash tool wasnt working, even in brave, my goto chrome-based browser when that is needed and firefox isnt supported) but even after installing all the libraries correctly, it seemed to keep cutting out partway through flashing.

I did notice in the system log ( system: Kubuntu linux) some error relating to overcurrent, but that may or may not be related. I did try an external USB SSD in that USB port afterwards and it seems to pwoer itself and work just fine off that port.

No matter what I plug the AirGradient into now (my laptop same port, my laptop, different port, my lenovo USB PD laptop charger, an external USB battery bank) i get nothing on the screen and no LED’s whatsoever. the only reason i know its on is the Co2 sensor blinks every few seconds and if i put my ear up close, I can hear the fan of the PM2.5 sensor spin up every few seconds (at least before i unplugged it after reading that it may cause the overcurrent issue (Failed applying Home Assistant ESPHome config to Open Air Outdoor Monitor (Pre-Soldered Kit) - did I brick it? - #3 by Achim_AirGradient). Nothing is detected by the computer as far as any serial interfaces to reflash and i dont think either of the buttons work either. Also tried removing all the sensors and that doesnt seem to help either

is there a way to factory reset or otherwise reflash the device to get it working again? Cant seem to find too many other posts on this forum relating to devices in such a state.

Please contact me through our support form on our website. We can do a zoom call and look into this.

Do you mean the section that says "For general and sales enquiries, please use below form. "?

The section of the support page for DIY, presoldered units (i.e. the one I have - sorry i just realized i should have mentioned this before) has linkspointing to this forum or the instructions (that i have likely already seen)

Yes that form. Thanks.

done - included a link to this thread in case it helps as well since this may have some additional details. Thanks for the help!

I thought mine was bricked at one point as well, but the process here under Boot Error made it so I could reflash it:
The AirGradient ONE Air Quality Sensor (Presoldered-Version, PCB Version 9)

If you were seeing overcurrent messages, then having the sensors removed as you did sounds like a good plan, and then try the process of holding the boot button while plugging in and see what happens.

But if it ends up being something like a solder bridge that is causing the overcurrent, Achim will get you all set through the support e-mail you sent.

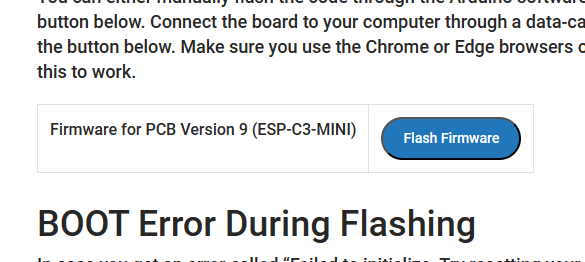
Yeah that was one of the things I tried once I realized i’d probably bricked it, but that didn’t seem to do anything and the instructions didnt seem super clear on a) how long to keep holding the button after applying power to the board, or b) what I should expect to see happen if that process worked, or c) whether the instructions are any different if you are using the arduino IDE to flash, as the next instruction after releasing the BOOT button is something about “the blue button above”, presumably referring to this section of the page with the web IDE, which on my browser (librewolf) shows up like this:


.

I was also not able to find any documentation on what the second “En” button next to the boot switch button was supposed to do.

Overall, I think this thing is so bricked that whatever code is supposed to run to handle that second boot mode (or facilitating communication via USB in general) is straight up not working.

I think my firmware upgrade attempts (that caused this in the first place) got as far as just barely starting to write to the internal flash of the ESP before it conked out, and i think this probably happened a couple times, so I probably corrupted the memory enough that it wont run and (based on the PM2.5 sensors fan and the light in the Co2 sensor) just seems to be bootlooping.

I suspect I might be able to recover it via one of the debug headers on the board (i do have one of these on hand) but i’ll wait and see what support says before doing something that might brick this even harder haha.

I sorta doubt this as the device was definitely working correctly (it was showing co2 readings) in the time between first plugging it in and clicking the “upload” button for the first time

Yeah, the blue button would have appeared where your screenshot says your browser isn’t supported:
image

You only need to hold the button for a second while plugging in the power, once it starts booting up and detects the button pressed, that is all that should be needed. Nothing will display on the OLED, but when I had to do it, it was detected as a USB device when I plugged it in, which was where I was having trouble in the past.

That should be the same mode regardless if you are using the web flasher or the Arduino IDE, but if you were having trouble with the Arduino flashing process, I would see if you could get a device with Chrome or Edge on Mac or PC just to try the web flash option with the boot button held while powering on, just to verify.

I would expect the ESP to be pretty resilient to a bad flash, at least with that boot recovery mode, so suspecting just a software issue I would think it could be recoverable, but I’m far from an expert on these hardware devices

Got curious about the requirements to enable that button. looks like its built using esp-web-tools, which has a demo page with a more helpful error message: ESP Web Tools " The demo is not available because your browser does not support Web Serial."

Web Serial API | Can I use... Support tables for HTML5, CSS3, etc confirms firefox straight up doesn’t do this, but my brave install (based on chromium 120) seems to support it. It seems like its just disabled by default due to security concerns but can be re enabled by searching for “serial” in brave://flags (or whatever regular chrome calls that menu). I believe i also opened the official arduino web IDE and installed their software that allows their IDE to communicate with devices, so maybe that helped to (Edit: seems like that was unnecessary - just uninstalled it and the button is still present - although maybe it is helpful as far as esp drivers go).

Are the two methods fundamentally the same other than the simplified user experience of web serial? or does the web interface offer better options for recovery in a situation like this?

The web interface will use a config file that is known to be fully compatible and has all required libraries etc, so you’ll go to the confirmed good state with it.

If you can get that going, then you are free to keep working with your Arduino IDE and find out what went wrong there, but the Web will be a Known Good config, which is helpful for determining if you are having a hardware issue or just software

Adrian, I got your message. We can arrange a zoom call tomorrow. Then if that still doesn’t work and your board is indeed bricked i will send you a new board.

I was able to fix the device myself. I suspect the issue was just an inadequate power supply (standard USB A port on laptop) while trying to flash via the Arduino IDE that potentially caused it to drop out halfway through the flash process.

Steps taken to resolve:

  • restart computer (mostly incidental due to travel but it may have helped clear any disabled USB ports or something caused by previous overcurrent events)
  • remove all sensors
  • connect to computer, see the serial device pop up
  • using a browser with WebSerial enabled per the above, perform the flashing steps as described on the instructions (i had to use the alternative boot mode but that worked)

Maybe i jumped to the conclusion that it was bricked a little too soon and/or wasnt following basic “try turning it off and on again” protocol…

Hi all!

I think I’m having this issue.

It appears I flashed a bad image. And now the device seems to get stuck in a boot loop.
No lights or screen. It will show up on the com port and disappear and re-appear the whole time.

When booting while pressing the Boot SW button allows me to connect via the com port again.
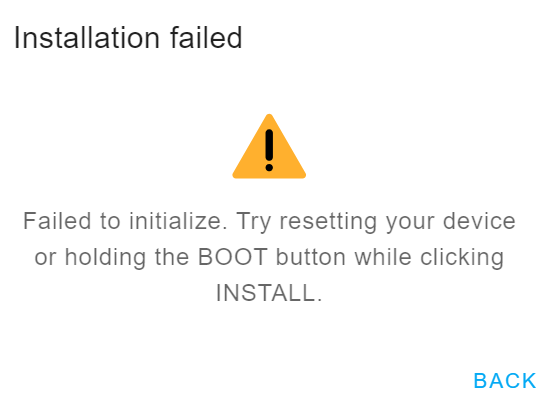
However flashing using the browser button linked above does not work for me. See the screenshot bellow.

Is there perhaps another way I can reset the device that I missed?

I am using my laptop. Connecting the device via USB. And running windows (can reboot to linux if needed)

image

I probably flashed the monitors 100s of times and never managed to brick even one. So I think this is unlikely.

You can try:

  • flash from a different computer
  • use a different cable
  • make sure you press the button during power on (not after)

Ey! A reboot and a different USB port worked. I also re-seated the sensors but i doubt that would be the issue.

Thanks for the super fast response also!